Click here for Nancy Cain’s Facebook live Bead-a-long Pendant
Click here for the materials list
Expanded excerpt published in Interweave’s Beading Daily’s online blog: Jul 20, 2009 by Michelle Mach on Nancy’s thread tension technique from Beadwork Magazine Aug. /Sep. 2009 – Pearl Romance Master class article.
The Secret to Perfect Thread Tension
By Melinda Barta – Editor, Beadwork Magazine
Hint! The Secret’s in the Tail
“It has been taped, cut short, knotted, stuffed into a baggie, wrapped on a spool, and just plain ignored.” In the August/September issue of Beadwork, Master Class author Nancy Cain urges us not to forget about our little ol’ tail thread. In fact, Nancy teaches that utilizing our tail thread is the key to keeping thread tension tight. We all know how frustrating it can be to finish a design and see thread showing between beads or, even worse, end up with floppy, loose beadwork.
 Structural and Strong
To be honest, when Nancy first tried to convince me her technique amazes even the most die-hard beaders, I was a little skeptical of the value of the tail thread. But after I held Nancy’s extremely strong beaded beads and learned that there are NOT round, solid beads supporting their core, I knew she was on to something good! Yes, the beaded beads shown here are hollow. Even more amazing, Nancy once accidentally stepped on one on these beads and it did not collapse underfoot!
Try It for Yourself
I tested out Nancy’s great tips with tubular peyote stitch. Pull back on the tail thread as you work, creating equal and tight tension between the working and tail threads. If you have difficulty holding the tail at any point, wax it.
Rounds 1 and 2: Leaving a 12″ tail, string an even number of beads. Pass through all of the beads again, plus two more. Do not tie a knot or use a “tension” or “stopper” bead.
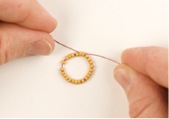 Round 3: Continuing to keep tight and equal tension on both the tail and working threads, work peyote stitch around, using 1 bead in each stitch. Step up for the next round by passing through the first bead added in this round.
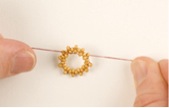 Round 4: Work peyote stitch around, using 1 bead in each stitch as before. Notice that during this round any space that was left between beads in Round 3 is now removed and the work is beginning to form a tube. If needed, manipulate the beadwork into a tube with your thumb and index finger as you pull equally with the needle and tail threads. Step up for the next round by passing through the first bead added in this round. You may find it helpful to wrap the threads around your fingers when pulling.
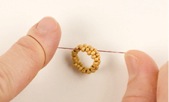 Rounds 5 and on: Round 5 “sets” the tension for the rest of the piece. By establishing the tension this way in these first rounds, you are ensured tight beadwork throughout the piece. When the work is complete, secure and trim the threads as usual.
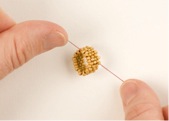
Utilize this great lesson by making Nancy Cain’s Pearl Romance necklace that appears on the cover of the August/September issue of Beadwork. Also, check out her Master Class article in this same issue to learn what she means by “letting your beads do the work.”
